Showing posts with label Fall/Halloween. Show all posts

Thursday, October 27, 2011

Halloween up in here

Ummm…people. It will be NOVEMBER in a mere days. What in the world? Less than two months till Christmas! And I still had my beachy vignette up till today. ;)

The new floors kind of put a wrench in the Halloween decor – most of it has been outside till today. But I finally got a little spooky display going with just days to spare!

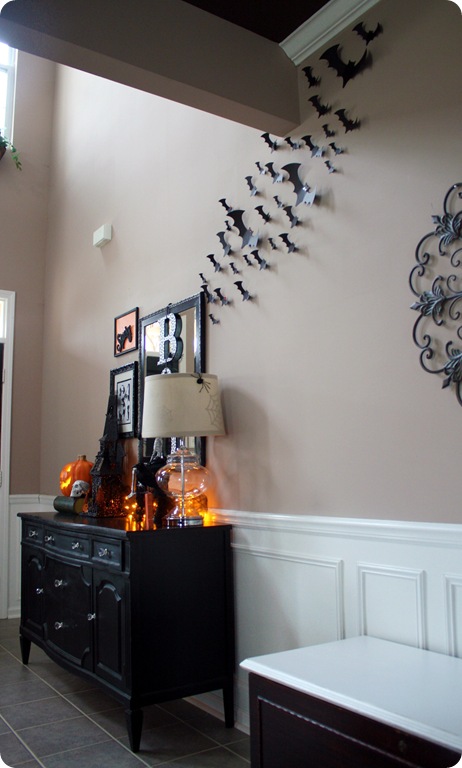
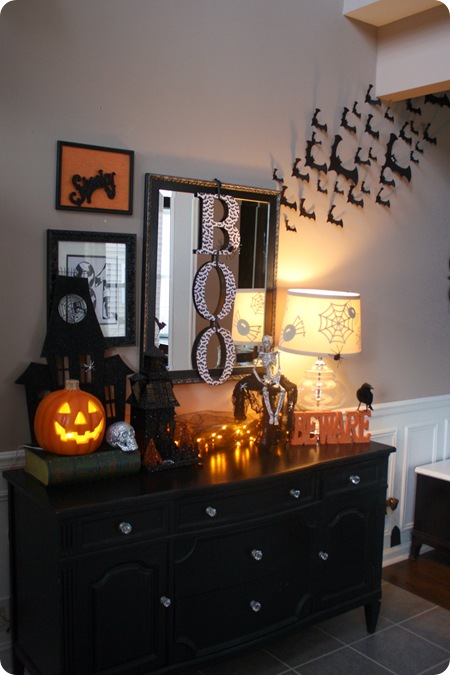
My Craigslist buffet in the foyer was such a great find – and it’s so fun to snazz it up every season. I love having this space to decorate!:

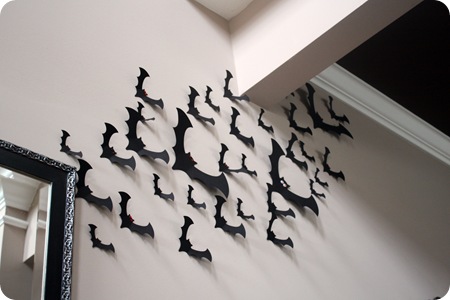
paper bats on wall

I threw this together today – and when I saw threw it together I’m for real. I had about a one spare hour today and was determined to get some Halloween out!

The Bub and I started with the bats:

bat cut outs on wall

Aren’t they AWESOME?!

We sat at the Silhouette machine for a while the other night cutting out meeellions of bats. (OK, so that part was already done. The rest of the throwing together happened today.)

To keep them from getting too serious, we added some googly eyes to some, some red sticky stones to others:

I did something similar last year, but I wanted to go big this year! I just put them up with sticky tacky stuff and made them “fly” up the wall. 

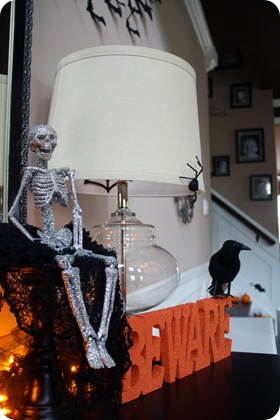
The vignette was put together with (mostly) items we already had, and just a couple new ones:halloween vignette
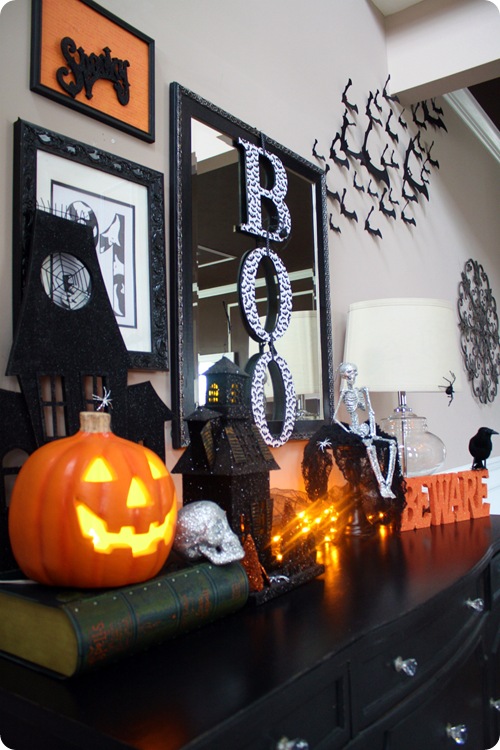
We found the black Halloween house earlier this season at HomeGoods. Soooo spooky!

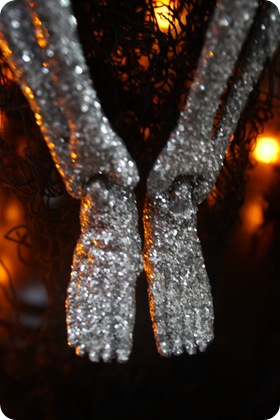
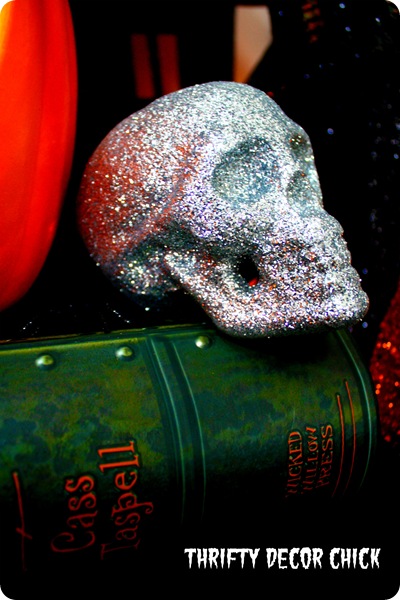
The only other new purchase was the sparkly skeleton that I picked up at Meijer a couple weeks ago (on clearance). I love his bling! And his cute little feet:

 sparkly skeleton

The BOO letters were a craft from a few years ago, and the “art” usually sits on our mantel this time of year:

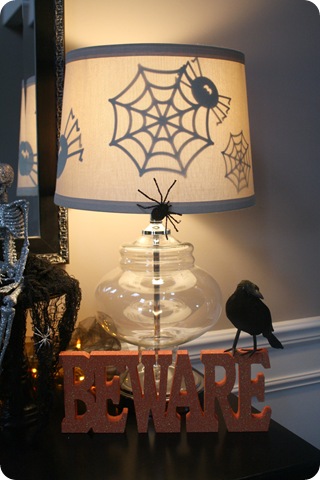
And of course, I had to bring back the little surprise on the lampshade:

halloween lamp shade

The spider webs and spiders are just black paper and I used little dabs of sticky tack to get them to stay up.

All of that adds up to one festive Halloween display!:

I smile every time I look at it, and the Bub is SO happy we finally got some Halloween inside the house. Just in the nick of time!

Do you decorate much for Halloween? Has the time gotten away from you like it has me?
Tuesday, October 25, 2011

Pumpkin Carving Party

Hey hey! I’m so glad you Squeezies are happy to see the mice again.

Well. Most of you. ;)

We hosted a little Halloween-themed shindig this weekend I wanted to tell you about in case you want to throw one together yourself this weekend!

I’ve wanted to have a Pumpkin Carving Party for years and always put it off because of the huge mess I imagined it would be. I didn’t really want to do it inside, and our back yard wasn’t really set up for it.

But with the addition of our our patio this summer we have such great entertaining space, so I wanted to take advantage of it! It was PERFECT for this little party!

I planned for this for months – I think I bought most of the stuff back in August. (Thank you, retailers, for bringing out the Halloween goodies so early!) I know myself and know I wanted to be as non-stressed as possible when it came to putting this together. I wanted it to be fun for the kids and the moms – including this one. ;)

So I planned early and made it VERY low-key.

The drinks were soda and water for the moms and Ghooooul-Aid for the kids. (How fun is that?) I added some Halloween ice cubes from Crate and Barrel:

ghoulaidcrate and barrel halloween

I just served it as a punch in a bowl from Target:

The kids LOVED the black drink. OH so spooky. :)

The food was crazy easy – on purpose. I made my little cookie sandwiches with Halloween icing and ready to bake cookies:

Pillsbury ghost cookies

You just sandwich two together with icing, then roll the sides in sprinkles:

They are SO yummy. I especially love these with the sugar sprinkles (for a little crunch), but I was using what I had.

The rest of the food was Halloween-themed snacks in individual bags:

I got two big boxes of these at Target and Walmart – I think they were $5 each? One box had cookie bags and one had chips and Cheetos.

This was not a healthy Halloween party. :)

The bowls, plates, napkins and cups were all from the Dollar Tree – can’t beat that!

It was all set up on the DIY potting bench Dad and I made this summer:

The table cover was a few yards of fabric from Hobby Lobby, on sale back in August. Score! (I even threw it in the wash after and it held up great!)

I didn’t plan any games or activities for the kids (other than the pumpkins). I was a little worried they would be bored.

But what am I, crazy?? They just…uh…played and had a blast!:

Imagine that. :)

We set up the pumpkin carving on the deck. I picked up carving tools here and there on sale over the past couple of months, but asked people to bring some if they had them:

Other than that, the only thing I had guests bring were their pumpkins.

I plan to do this again next year and may have smaller pumpkins for the kids to paint and decorate on their own, because of course the Mommas did most of the carving work:

Eww. :)

The hit of the party was this “gutter” I got at Walmart:

pumpkin gutter for drill

It attaches to the drill and makes quick work of getting the goo out of the pumpkin – it rocked! (Click the photo above to see it at Amazon.)

The party was low stress and BIG fun. :) We ended up with some cuties:

pumpkin carving party

(Some of the pumpkins didn’t make it into the pic, but they were all super cute!)

We had such a great time and I can’t wait to do it again next year! I only invited a few close friends this year, but when we do it again I hope to invite even more and put up additional tables so everyone can spread out.

The best part was that I wasn’t running around like a crazy woman beforehand – I was (mostly) chill. ;)

Do you host a Halloween-themed party? Is it for the big kids or the little ones? What do you do to keep it low key and easy going (for YOU)?


**Don’t forget I am answering any and all DIY questions over at the True Value Facebook page this week!

Monday, October 24, 2011

They’re Baaaack!!

taking carpet of stairs

Well, you knew it had to happen…the mice are BACK baby!!

Technically, I think they’re called rats:

That’s what Martha Stewart calls them anyway. Or maybe they are mice? Who knows.

I just LOVE THEM.

I know they give some of you the heebs, but I’m quite taken with them. Look away my friends, look away.

I got a little, teensy more creative with them this year…a couple of them are checking out the kids:

And a few are rocking some sparkly witch’s hats:

I cut the hats out with my Silhouette, but they’re looking a little more like floppy beach hats then witch hats. Oh well. I still dig ‘em.

A few of you have asked if our stairs match the new floors:

mice silhouettes on stairs

No, not well. :)

The stairs are Bombay Mahogany (red) and the floors are Jacobean (brown). But I’m not complaining! I still love them both so much it hurts. ;) Someday I’ll have the stairs sanded down and restain them, but for now, I’m good.

Of course, I wanted to add a little glow to the fall stairs, so I added some DIY votives. I had picked up some cheapy light covers at True Value this summer to do an outdoor project, but the warm season got away from me.

Since I already had them, I decided to make them work for this season:

They are the glass covers that go on light fixtures and they cost $2-something each. They’re nice and lightweight, which gave me another idea, so I got a few more today for an upcoming project. We’ll see how it goes. :)

I filled them with cutie acorns I picked up at Meijer weeks ago:

They look like acorns roasting on an open fire, but the candle is really just an LED light. I’m obsessed with these things. I love how they flicker like real candles. (You can find them just about anywhere anymore, but I’ve gotten most of mine at the dollar store.)

I still say, for $50, this stair redo was the best DIY project I’ve ever done:

martha stewart mice silhouettes

Cause now I can put rats mice on our stairs and that makes me silly happy. I love these little buggers.

I was going to put little teeny pumpkins by their little mice holes (like it’s their front porch…get it???) But I decided I should probably calm down and reel it in Sarah!

The sparkly witch hats are plenty:

pumpkins on stairs

(The pumpkins and votives are tucked under the railing so they aren’t a trip hazard.)

I can’t wait to get them all dressed up for Christmas!! (Don’t freak out. I don’t keep 12 rats mice on my stairs at Christmas. Just a couple.)

If you haven’t seen – the Dollar Tree has a TON of silhouettes this year – mice, crows, owls – bunches of them! The Martha Stewart mice are only $5 at Michaels (for 12) and I think I got mine on sale for even cheaper.

Can you even BELIEVE it will be November next week? I feel like it was June just yesterday. Crazy.


I was one of the bloggers selected by True Value to work on the DIY Squad. I have been compensated for my time commitment to the program as well as my writing about my experience. I have also been compensated for the materials needed for my DIY project. However, my opinions are entirely my own and I have not been paid to publish positive comments.

Wednesday, October 5, 2011

Fall Outdoor Spaces Party!

Hey there! It’s here! The final fall linky party in our Fall Extravaganza:

image

Layla, Rhoda and Kate and I have such a blast throwing these shindigs! I hope you have found some inspiration (and new visitors!) throughout the past couple of weeks.

My outdoor space started with a big change  -- yes, I painted our front door! I have to admit -- it was nerve-racking. I had been thinking of painting our door red for months, but was soooo sceered. I even mentioned it on Twitter one day and I tell you what, you all are a bunch of enablers.

And I love it! ;)

You were all, DO IT! You’ll love it!! Crack under our peer pressure!

And that I did. It just took me a while.

Our door was actually a greyish brown – but it always photographed blue:

Many of you have asked the paint color of my “blue” door! ;) The color matched our shutters and I’ve always loved it…I was just ready for a change.

I think your front door should make a statement, and I knew if I got the right color, a red door would look fantastic!

Well. It was definitely a lesson in picking out REDS. GoodNESS. It took three different colors. I wanted brick red – and the first “brick” color was orange. The second was pink.

But just like Goldilocks, the third was just right. :)

red front door

This is the color what I think of when I think of brick. Maybe it’s just me. ;) The color is called  Chocolate Cosmos and it’s from the Martha Stewart line at Home Depot.

(Although now it photographs purple – so I can’t win for losing!)

I changed out the hardware as well – our old set was seven years old and was showing it’s age. It was brass – which I actually didn’t mind because it wasn’t so shiny anymore. ;) But it was in sad, sad shape.

The ORB set is so sharp against the red!:

square fall wreath

I took down the light fixture and cleaned up the glass, then sprayed it in an oil rubbed bronze:

It’s AMAZING what some cleaning and spray paint does for…well, anything. :) You can go here to see how I transformed our coach lights the same way last year.

The red door is actually more of a reddish brown, which works PERFECTLY with our other brown accents:

cottage exterior fall

Because I cleaned up the front a few weeks ago, I was able to add a hay bale next to the porch for the first time ever:

hay bale fall

I’ve always wanted one – I was so giddy about that silly bale of hay! ;) Now that the landscaping bricks aren’t there anymore, it just fits.

We’ve been picking up pumpkins here and there over the past few weeks, and I piled them all on the hay. Most will go inside eventually, but I LOVE the big cluster of them, snuggled up with the mums.

I LOVE FALL!!!

(Have I mentioned that?)

I was going to put the mums in the pots, but I found Cinderella pumpkins for a steal at a local pumpkin patch. I’ve seen these for as much as $12 each this year! Craziness!!

I stacked them three high and they are so fun:

I love how the front has changed this fall – the landscaping, the door, the hay. ;)

Of course it isn’t fall around here without my corn stalks – I love how they cozy up our small front porch:

brick red door

(This pic is the true color of the door.)

Now I just need to decide if I’m putting the “Welcome” vinyl back! For now I like it simple – but we all know that could change fast.

The new color works perfectly with the colors in the window boxes:

fall window boxes

I would like to say I planned that, but no. It took three tries, remember? ;)

See that sweet smushy-face in the window? My heart!

I’ll show you more about installing the hardware and a how-to on painting the door in an upcoming post! One was way easier than I thought and one was way harder. (Five hundred points to the person who guesses the three-different-reds-door.)

Now I can’t wait to see your lovely outdoor spaces all decked out for fall! I know many of you may have shared your doors and porches at Rhoda’s door decor party last week, but feel free to link up again!

I would love it if you would copy and paste this cutie button into your post, or link back to this post in yours:

image

Thank you and have fun!!

Monday, October 3, 2011

Before & After Party: Ghosts in the Trees!

Well hello! I hope you had a wonderful weekend! I got SO much done around here. DIY-wise anyway. You can’t walk through the house without stepping on a toy or a piece of clothing – but the projects went very well! ;)

It’s time for the October Before and After Party, and I’m also linking this up to Kate’s fall craft party tomorrow! Linking a party up to a party --  not sure that’s even allowed.

Breaking the law! Breaking the law! (90’s flashback anyone?) ;)

fall linky party

Anyway, I’ve got a super quick, super cheap, SUPER FUN Halloween project for you today – it’s adorable. And the kids will LOVE it.

I had this idea last Christmas, and I doubt I’m the first to come up with it. But, really, am I ever? I doubt it. Too much awesomeness out there.

I bought a package of small Dollar Tree ornaments last year just for this project, and the rest of the stuff I had on hand:

halloween ghosts using ornaments

I used some scraps of batting (I knew they would come in handy someday!), and some muslin. If you don’t have these – you can easily skip the batting, and the muslin is SO cheap.

I just wrapped a piece of batting around the ornament, and made a hole so the top could stick out. Then I covered that with the muslin:

IMG_7250 IMG_7251

Later I snipped a hole in the muslin as well, so I could hang them.

Like I said, the batting is not necessary – I just thought it would make the ghosts a little more chunky chunky. (Which is never a bad thing.)

I used some Halloween ribbon I had to tie a “neck” around the ghost:

I ran out of that after the first few, so I just used some twine for the rest.

Then…you take a cutie patootie I could just squish him Bub and have him draw faces on them:

IMG_7258

So cute I could squish them faces!:

The faces were so precious, I just couldn’t bear to leave them outside in case it rained. So these stayed in, and we made more (without faces) for outside.

I taught the Bub how to use my camera the other day, and now I have to fight him for it every time I bring it out. (GREAT idea, really. Gah.)

He’s caught some surprisingly great photos though!:

DIY ghosts in trees 

We hung them with twine throughout the trees:

ghosts from trees muslin

We loved them so much, I dug a few more little ornaments out of the Christmas bins to make a few more. :) They hold up great to the weather too – we’ve had a ton of rain and they are doing great.

They are SO CUTE swaying in the wind. They make me smile so BIG when we drive up to the house.

I’m thinking about adding some felt faces to them, or maybe some googley eyes. Wouldn’t that be adorable?

So here’s my (FREE to me!) Halloween/fall craft before and after! From cheapy Christmas ornaments:

To cutie friendly ghosts swinging in the trees:

I can’t wait to see what you’ve been up to! Any fall goodness this month? And don’t forget the craft party at Kate’s place on Tuesday!

If you would, please link this post to the post you are linking up – I really appreciate it! You can copy and paste this button in as well if you’d like!:

beforeAndAfterButton