Showing posts with label inspiration. Show all posts

Monday, October 31, 2011

53 Days

Hello and Happy Halloween! Hope you had a wonderful day and evening! :) We had a great time chasing a very excited pirate around the neighborhood. And I ate a LOT of food. I mean. Lots.

Well, it’s about that time folks. It’s now November…uhhh, well it will be when most of you read this…so I’m allowed to say the “Christmas” word. I’ve actually been talking and thinking about it for a good month now, but November 1st gives me the go ahead to hide it no longer!

I’m freeeee!!

I’m a Christmas fareeek, so bear with me. And yes, I know a little holiday called Thanksgiving comes first, but I’m thankful every day, so I don’t get as excited about that one. :)

This time of year I’m always thinking about the countdown -- I love checking out all of the advent ideas out there. Because many of us love to DIY, I thought I’d share a few of my favorites (old and new) now so you’ll have plenty of time to get crafty. (OR pull out the bank card and order one – I feel ya.)

Click the pics to see more about each one!

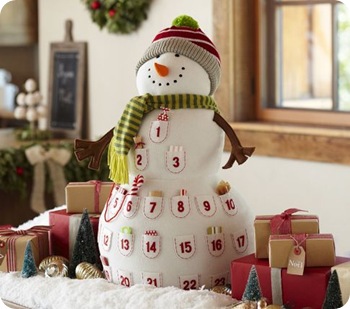
Pottery Barn never fails with the countdowns – this snowman advent is too cute!:

img14b

The price is not…but there’s gotta be some way to DIY this! I just can’t think of one right this second. My mind is a mush of Halloween candy. :)

This one is adorable and could be knocked off for sure:

Felt cut into stockings and glued on – love it!

This is an oldie but goodie, and SO doable. I searched for mini buckets last year to do this one and couldn’t find what I wanted (for cheap). I even asked the folks at Logan’s Roadhouse and they wouldn’t sell me some – boo!:

Anyone seen mini buckets at a good price?

I love this advent pillow at Ballard Designs:

And I know some of you crafty chicks could pull this one off! I on the other hand, am still working on the sewing a straight line thing.

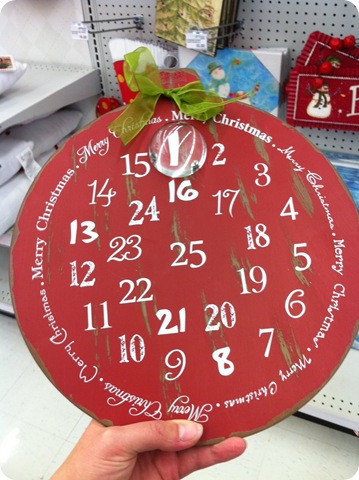
I found this one at Meijer the other day:

It’s just a round metal sheet and there’s a magnetic glass piece that goes over the numbers and magnifies them. I think it was $10? Super cute!

I’m always blown away with the handmade ideas I see every year. I used cardboard boxes, paper and stickers from the craft store to make these years ago:

They have held up great! I used to fill each one with small toys or treats, but we need more itty bitty toys in this house like we need a poke in the eye.

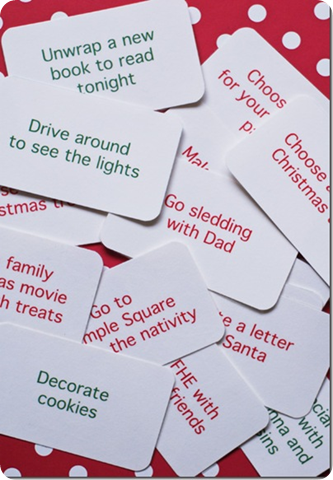
So I loved these simple activity cards with holiday themes instead:

Sooo doing this! Along with a few treats and toys…just a few. ;)

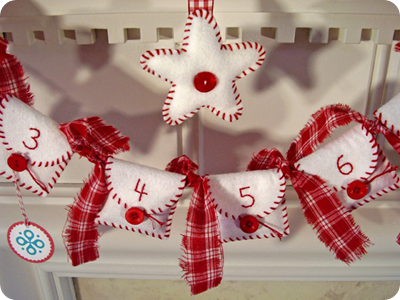
I’ve found a few more ideas on Pinterest over the past few weeks – love these little felt envelopes!:

Oh, they are too precious!

These Christmas trees are something different, and would be SO easy (and cheap!):

Wouldn’t they be fun across a mantel, in all different sizes? They’d have to be up high in this house – little hands wouldn’t be able to resist peeking underneath. :)

This one is simple and lovely:

Just clothes pins glued to a board, decorated with a bit of ribbon. Clip the little treats up each day – too sweet! I may have to try this one.

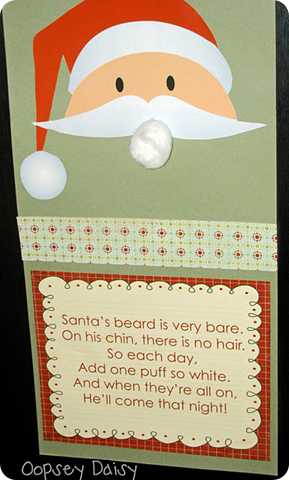
But my favorite yet is this idea:

OH my…the cuteness!! This one WILL happen at our house. Just adorable. And it doesn’t involve treats or presents…just one-on-one crafting time with the kiddos for a few minutes a day. LOVE.

Do you have a favorite advent or Christmas countdown tradition? I’d love to hear! If you’ve blogged about about one, feel free to leave a link in your comment. And I promise not to mention the C-word again for at least 24 hours.

:)
Tuesday, September 6, 2011

Comfort Foods

Can someone check my temperature? For real – I have been a cooking fool over the past week. Like, using my crock pot more than I have in the past year.

In a week.

And this, the week we have no kitchen. Well, we have one, but it’s kinda half of one – I have to walk across the house to get to the fridge in the garage. Which makes cooking way more exercise than usual.

Maybe I’m burning off the calories of this good stuff?? Maybe not.

And really, is crock pot cooking really cooking? When I do next to nothing and it does it all, I feel like I’m cheating when I say I’ve been cooking.

All I know is I’ve been making yummy meals and I’m loving it. Imagine how much I’ll love it when I have my island and garbage can and refrigerator back? It’s going to get spectacular!! ;)

I’m sharing some of our favorites from the past week or so and some changes, if any, that I made to them. (I’m just sharing the original poster’s pics and I’ll recap each recipes here.)

First up – a truly scrumptious recipe I found on Pinterest from Bubble Crumb:

Crock Pot Chick and Dumplings

IMG_1890

It is SOOOOO good! Whooeee, I’m so thrilled to find this. I am a chicken and dumplings NUT. Have you had them at Cracker Barrel? (I almost wrote Crate and Barrel. You can how much I think about cooking – never.)

Anyway – yummo! This does not disappoint.

Here’s the deets:

4-6 boneless skinless chicken breasts
2 tablespoons butter
2 cans cream of chicken soup
1 can chicken broth
1 onion diced (I used half of one)
1 tablespoon dried parsley
4 grands flaky refrigerator biscuits (I used five)

Put the chicken, butter, cream of chicken, chicken broth, parsley and onions in the crock pot and cook on high for four to six hours. Mine only needed five, and probably didn’t even need that much.

As the chicken cooks and gets tender, break it up with a spoon or fork, whatever.

Get your biscuits and cut them into nine pieces. I kind of rolled them into balls to ensure they stayed whole but it’s not necessary. Stir into chicken mixture and cook for another hour.

(The recipe says to cook for 30 minutes and my biscuits were not done at that point. One hour did the trick.)

I noticed as it cooked that it was a tiny bit thick, and the recipe said to add chicken broth if necessary. I was out of that, so I used chicken soup and it worked great. ;) I just put a bit in to make it a little creamier.

It was AWESOME. (!!!)

Next up, one of the many great recipes from Tracie’s place that I shared last weekend. This one is crock pot mac and cheese:

Crock Pot Easy Mac and Cheese

DSC_0149

The goodies:

1/2 pound elbow macaroni
4 cups shredded Cheddar cheese, divided
1 (12 fluid ounce) can evaporated milk
1 1/2 cups milk
1 egg
1 teaspoon salt
1/2 teaspoon ground black pepper
Dash of Worcestershire sauce

Very important before you do anything – spray the crock pot well with cooking spray. This cheesy goodness will stick otherwise. I sprayed but not well enough. :)

Mix the egg, fresh milk, evaporated milk, and Worcestershire together in a large bowl. Mix in the uncooked macaroni and three cups of shredded cheese. Pour into the crock pot and sprinkle the remaining cheese on top.

Cook on low for five to six hours. Do not stir or remove lid while cooking.

That whole not stirring thing was so hard for me. Not sure why. I always feel the need to stir.

I cooked ours on high for five hours and it only needed four, if that. It was a bit overdone. I also used a bit too much cheese (I know, is there such a thing?) – I used thicker shredded cheese, and I think the finely shredded would have worked better. It was just major CHEESE and combined with being cooked a bit too long, it wasn’t as good as I know it could be.

But, it was still GOOD. :) I know it would be GREAT with those little changes. I plan on giving it another go this weekend. ;)

And I saved the best for last…hold on peeps. This is fan-freaking-tastic. I also found this on on Pinterest and it’s from Chef Mommy:

Crock Pot Creamy Chicken and Wild Rice Soup

Ohhh…I’m drooling just thinking about it. SO. GOOD.

This one takes a teeny bit more work, but it’s so worth it.

4 cups chicken broth
2 cups water
2 boneless, skinless chicken breasts
1 package of Rice-a-Roni long grain and wild rice
1/2 tsp salt (plus more to taste)
1/2 tsp pepper
3/4 cup all purpose flour
1/2 cup butter
2 cups half and half
1 cup grated carrots
1 cup diced celery (we’re not bit celery people so I used one small can of mushrooms – SO GOOD)

Mix the broth, water, carrots, mushrooms, chicken and rice (and the seasoning packet) in the slow cooker.

Cook on low for six to eight hours or on high for four hours. I did the high version and it turned out great.

Once chicken gets tender (couple hours in), break it up into pieces while cooking.

At the end of the cooking time, get a small bowl and mix the salt, pepper and flour. In medium saucepan over medium heat, melt butter. Stir in flour mixture by tablespoon to form a roux.

I had no idea what a roux was, but found out it’s a mixture used as thickener for stews, soups and gravy:

roux 
(source)

Then, while still on the heat (I’m guessing here – that’s what I did), whisk in the half and half, a little at a time, into the roux until mixed completely and smooth.

Stir this yummy mixture into the soup in the crock pot then let it cook on low for 15 more minutes.

Then die and go to heaven cause it tastes that good.

Oh my goodness. I think I need to go eat some leftovers.

Mine was a bit thick – almost like gravy, not soupy like the photo. But that’s how we like it. :) You could add a bit more broth if you like it thinner. (Wait to see how it cooks up first.)

So there you go – my very favorite comfort foods from the past week! I really don’t know what is wrong with me – we’ve had cool weather the past couple of days, but the chicken and dumplings I made on a 95 degree day.

I guess I’m just craving comfort. ;) If you are too, you can’t go wrong with any of these!

Any yummy, easy fall recipes you make all season? I’d love to hear about them -- I need to plan out the dinners for the rest of the week. Stop laughing, I’m FOR REAL.

Yes, taking my temperature. And then reheating some leftovers. Hollllla…

Wednesday, August 17, 2011

Pottery Barn pillows (on the cheap!)

pottery barn pillows blue yellow

Well hello! Hope you are having a great week! There has been awesome progress on our outdoor project this week, and I’ll show you that very soon! It is SO exciting to watch an ongoing project that I don’t have to complete myself. It’s an odd feeling to not be doing the work…but pretty a cool one. :)

Anyhoo…so I may have mentioned a few times that I’m nutty for the Pottery Barn catalog. I’m pretty much counting the days till the fall version arrives. (There will be some gleeful squeals. Get ready.)

It’s totally free inspiration, as is a trip through the store. ;) The store version is more dangerous though…cause you may or may not find a couple $3 mercury votive holders you MUST. HAVE.

Or something.

Last week I took a trip though to see if they had fall stuff out check out the inspiration, and I ended up at the table linens area. I noticed a few things – first, they were on sale. SCORE. Secondly, they had so many fantastic napkins, in some fabulous colors and combos.

I put a few together to show how they could work together:

 ikat pottery barnpottery barn napkins

Why would you want to combine napkins in different colors in designs you ask?

To make them into pillows of course! I noticed a trend while there – many of their napkins are also versions of their pillows:

So my brain got to thinkin’. And you know that’s dangerous…for Pottery Barn anyway. ;)

I wanted some late summerish, (almost) fallish pillows in our living room, and wanted to break away from the standard reds and browns I’ve always used. I’ve been pulling in blues over the past year and was determined to make the blues work for fall(ish. It’s not fall yet. I know. Ish.).

I have a love/hate relationship with our sofa in that room – it’s OH so comfy, and actually a great, sturdy couch. It’s just the fabric…oh my dear, it drives me NUTS. And the color, it’s as gold as gold can be. I want to recover it but that’s an entirely different post. Altogether. A long one.

Anyhoo again. I decided to just work with the gold instead of fighting it, and PB had some beautiful yellow and blue combos that I loved! There was an awesome ikat pillow in the store that day:

blue yellow ikat pottery barn

(It was the one on the left but I love both!)

I’ve never been a big ikat girl, and I know it’s trendy, and I’m probably coming in at the end of the trend, and all the sudden I like it. Of course. I’m OK with that. I like what I like, when I like it. Don’t try to make sense of it, your head will hurt. ;)

So I grabbed a couple of napkins and made myself a pillow:

DIY pottery barn

Boom.

Their (embroidered) pillow cover, $59. Mine, I think $8?

I had some fabric for another (upcoming) project, and thought it worked great with the blues in the PB linens. So I made another pillow. LOVE. (I got that blue fabric at Joann’s a couple months ago.)

I found a blue and yellow placemat at PB that day as well, and I knew just what to do with it. I opened the side seam and stuffed it:

pottery barn placemat pillow

Like I’ve shown you here. And a how-to here.

Two Pottery Barn pillows for less than $20 – gotta love it! And I could have made three if I used the ikat napkin on one side and a basic white fabric on the back.

Because I saved so much on those, I splurged on the big blue medallion pillow in the back. I have purchased PB pillow covers before and they hold up GREAT.

But like always, I used a pillow we had to fill it – but it was still a bit wimpy. I hate wimpy pillows. So I stuffed a bed pillow in there:

IMG_6368

I do what it takes. :) It worked great!

And like always…my versions are not for the faint of heart up close. A little rough. So let’s stay far away:

blue and yellow pillows

:)

I’ve been trying to be more adventurous with mixing patterns and colors – the colors in the pillows are in the drapes and I love how they all tie together!

And I love that ikat so darn much I think I’m going to make another one to put on another chair in the room. :)

I have to show you another find for this room! I have wanted to replace our chunky Goodwill coffee table that has been in and out of there:

(Old pic from the red and black days.)

While on a trip to Garden Ridge last week, I found pretty much EXACTLY what I’ve been looking for:

It opens up the space SO much! I LOVE it.

It was $60, but I figure if I sell a couple Craigslist coffee tables (on Craigslist), I’ll make up for that easy. (I've got a couple.)  ;)

I have a few more changes planned for this room, but for now, I’m so happy with how it’s changed over the past year:

The pillows and coffee table have transformed it yet again…for $80. And yet again…I have ensured that Pottery Barn will never advertise on TDC. ;)

You can make pillows out of just about anything – linens, shower curtains, sheets, whatever! The possibilities are endless! Have you made any unconventional pillows? Link to them in the comments if so!

Tuesday, June 7, 2011

When DIY Goes Oh-So-Wrong

This is the story of a fun, free DIY project gone very, very wrong.

Fun…snort. Free? Whatever.

It has a happy ending, thankfully.

It was ALL my fault, and there may have been a few tears because of that. :)

It started with my love of black interior doors. I’ve been smitten with them for years now, but I’ve always been just a teensy scared to get out the paint brush.

But then I noticed a trend in some of my pictures on Pinterest:

tommy symthe kitchen

(Tommy Smythe’s amazing kitchen.)

And this one:

image

THIS one!:

image

OK, those aren’t doors, but whatever, they’re gorgeous.

I thought the atrium/french doors were particularly striking in black. And then I thought…HUH. I have one of those!:bay window round table

Why don’t I try it?!

DISASTER WILL STRIKE, SARAH! THAT IS WHY!

Gah. Learn from my mistake people.

I figured it would be super easy (YEAH!) – would just take the plastic grid off and spray paint it, then paint the door. That way I wouldn’t have to worry about taping and cutting in and all that jazz.

I took the grid off the door:

I couldn’t get the little jobbies that cover the screws out, so I used a drill bit and screwed it into them to pull them out:

It worked great!

They were ruined, obviously, but I figured a few bucks for new ones wouldn’t be a biggie since this was going to be a FREE project.

Ha.

I noticed a couple things when I took the grid off – one was that some water had had seeped in through the door at the bottom somehow:

I made a mental note to use some silicone to seal it up real well when I put the grid back on.

Then I noticed that the window was a little loose. I realized that the screws that went into the interior plastic grid held the whole thing together.

But there was a bead of silicone or glue that was used when it was installed, so it was still fairly secure.

Huh, thought me. I should be a little gentle while painting this.

You see where this is going.

I went out to the garage for just a few minutes to spray prime the plastic grid.

I came back in to this:

Did you catch that?

Here you go:

cry.

That would the glass in a meeeeellion peices. A hole in our door. A hole in our HOUSE people.

I think I was in shock. I didn’t hear it happen. I had no idea.

In the few minutes I was out in the garage, the wind had picked up just a bit. A storm that was supposed to go over us was heading our way.

FANTASTIC. Awesomesauce!!!

Massive storm coming, and I have a HOLE IN MY HOUSE.

Think Sarah…THINK!!!

I grabbed some trash bags and some duct tape to start covering the hole:

Just in time for it to start POURING.

I called a few hardware stores, thinking I could just go pick up a replacement window. Easy, right?

Nope. NO ONE carries them. They are special order. A week at the very least.

Did I mention it’s pouring?

Or that our power went out about ten times while I was on the phone with the hardware stores?

I was laughing hysterically, just so I wouldn’t cry.

Did I mention hubby wasn’t home?

I decided I would just have to buy a new door. So I texted hubby and while trying not to freak him out, told him WE HAVE A HOLE IN OUR HOUSE, (and a picture of it) so come home, like now.

Or something.

My precious husband, the most patient man I know, the man I love with all my heart, just said “Coming home now. Don’t worry honey, as long as you’re OK, it’s no big deal.”

Did his miss the HOLE part?

No, he is just that good. :)

I needed him to come home cause I wasn’t going to leave the house with plastic covering the door. Hello – come on in crazies!!!

But when I called to get pricing, I realized something. You can’t buy just a steel door – they come in the actual framing. That is a huge DIY project. It would mean taking our whole frame out, replacing it, then reinstalling the door.

That’s when I started to panic a little. :)

Thankfully we have a small overhang over our door, so it wasn’t getting super wet. We were able to tape up some lawn trash bags on the outside. It was pretty airtight.

But I wouldn’t call it secure. And that’s when I started to get really upset. I felt like I had put us in harm’s way with a silly project. I was SO mad at myself.

A friend suggested using plywood to cover the door, so at 10 p.m., we started screwing in the boards from the inside:

It made us feel a lot better – even if it wasn’t the most secure job ever.

Notice the extra boards leaned up against the door, to keep out the crazies.

:)

We don’t have a plethora of crazies around here, but you dream up quite a bit of them when there’s a gaping hole in your house.

Long story short – we called no less than 20 businesses, and not ONE carried the insert. I thought it was nuts – we were going to have to wait a week for the order to come in, when it would take five minutes to install a new one if we could just find it!

I was on my way to Menard’s to order the insert yesterday when I got a call back from a place I had left a message with Saturday night. No, they didn’t have it, but she gave me a number for a lumber supply company that might.

I thought there was no way a lumber company would carry it, but I called anyway. And they HAD IT. With delivery, it was half what we would have paid at Menards.

All in all it was a $90 mistake, for the insert, delivery and plywood.

Because I had already primed the door, I had to finish the job.

And I love, love, LOVE it:

black atrium door

It is SO sharp looking! Oh my, why did it take me so long to do this?

Don’t answer that.

And dare I say it – the shiny brass looks pretty darn fantastic against the black!

Was it worth it? Now I think so, but when all I could think about were crazy people, it so was NOT. :)

I love the transformation, though – and it would be free if you weren’t a total GOOF like me.

Live and learn, right?

Here’s the bay window before:

image

The door just kind of disappeared.

And now it POPS!:

black interior door

I like how it kind of balances the black pantry door too. I absolutely love it!

I BETTER.

Had any major DIY catastrophes at your place? Please share. Make me feel better. :)

**Double thump to the chest to Marty at Hall and House in Westfield, Indiana! Thanks for your help!!

Saturday, May 14, 2011

Organizing the inspiration

Hey all! Some of you may have noticed that Blogger was down for awhile this week, and when it came back up, my last post lost all of it’s comments. So if you left a comment with a suggestion (I’m looking for perennial ideas), I would love it if you would add it to the comments again. (I reference them later!)

Speaking of referencing ideas. ;)

Many of you have asked how I organize all of the DIY project ideas that fill my brain. You know, those ideas that pop into my head right as I’m falling asleep and then keep me awake at night. (For reals…it’s sad.)

If it’s something I want to make sure not to forget, I’ll write it down on a notepad. I have one I’ve written ideas on for years. But many of my projects are born from inspiration I see in magazines or online.

Up till a couple weeks ago, my main method for organizing those was a binder:

image

I showed you my loverly binders on this paper organizing post – and one of them is filled with pages I tear out of magazines. I have four categories – walls/art, holiday, general projects, and general decorating ideas.

Some ideas I’ve had in there for years, like this project:

And I’ve had the supplies for it all that time too. ;) Need to get on that.

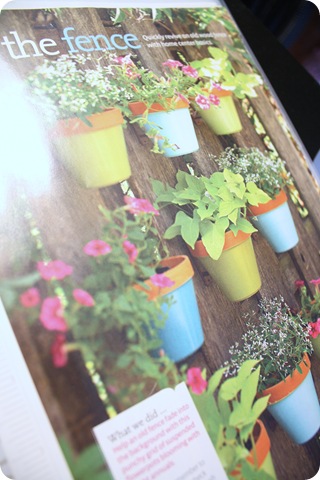
I love these fence pots:

fence post planters

And I look at them every summer and haven’t done it yet. ;)

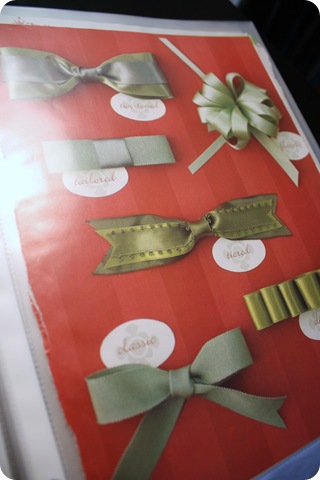
I keep lots of how-to’s, like this one for all types of bows:

IMG_4812

And this one for the proper way to prune a bush:

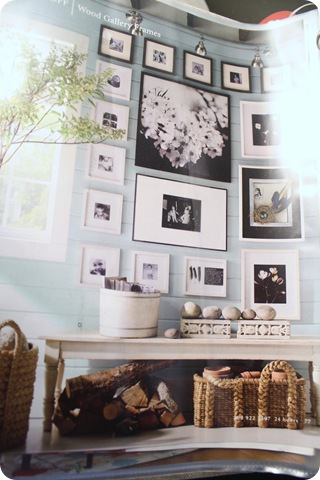
Most of the sheets are just pictures of beautifully decorated spaces. This Pottery Barn gallery wall is one of my favorites:

IMG_4811

Love those lights at the top!

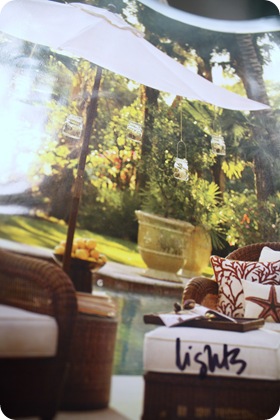
Every once in a while I’ll look back at my filed pictures and wonder what in the heck I wanted to remember. So I started writing on the pages:

IMG_4819 IMG_4820

The binder is stuffed FULL with ideas. But the problem is, I rarely have a few extra moments to sit and peruse my pretty binder. And if I do have an extra few minutes, you know I’m usually painting something. :)

Then I heard about Pinterest. It’s such a FUN way to organize and categorize all of the inspiration I find online:pinterestview

I was so scared of it for the longest time – it seemed like it would be so complicated and all…technical. Me and techy don’t mix. ;)

But I tell you what – I had it figured out in about three minutes and I haven’t stopped “pinning” since.

When you sign up you just drag the “Pin It” icon up to you tool bar and whenever you’re online and see something you love, it just takes a click on that little button. It pins it into the category you specify, just. like. that.

You can also follow others and see what they’re pinning, and I find most of my ideas from those I follow. It’s awesome. I’ve already found SO MANY beautiful projects I want to try!

Like outdoor projects:

Or fun stuff, like how to make moon sand:

The stuff is evil, but the Bub loves it.

There’s all kinds of helpful tips I didn’t know about, like how to remove a stripped screw:

A bunch of yummy recipes and ideas:

fourth of july strawberries

And plenty of good old beautiful decor ideas:

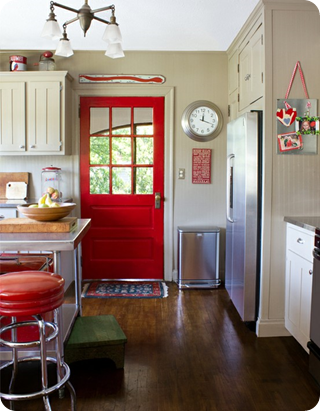
red door kitchen

I LOVE that red door!

My favorite part is that it saves the permalink when you save from your computer – so you just save it to your account, and you can always go back later to see more details.

You can also load pictures from your computer and if you have an iphone and the new app, you are supposed to be able to take photos and load them, although it hasn’t worked for me yet. :)

Although many bloggers use it – I think it’s a great resource for anyone! I have a girlfriend who does does a lot of etsy searching for the fantastic birthday parties she throws for her kids. This is a perfect way for her to save those ideas!

It really is SO FUN. It’s easy to get sucked in though – you’ll go in for two seconds and be on for an hour. And all of the sudden I want to search the Internet for every idea I’ve ever had, just so I can pin them. ;)

The only kicker is you have to be invited by someone who has a Pinterest account, or you can request an invite on their site. I hear that takes a few days to come through though.

If you would like a invite, send me an email and I’ll try to send you one! I’m not sure how many I can send out, but I’ll invite as many as I can (and as many as I can get to!)

So there you have it – two ways to organize the inspiration! One for the magazines, one for online ideas. I’m definitely referring more to the online method now that I’m using Pinterest.

**My friend Beth created a great tutorial on how to use Pinterest! Check it out here.

***I have no affiliation with Pinterest, I just love it. :)